


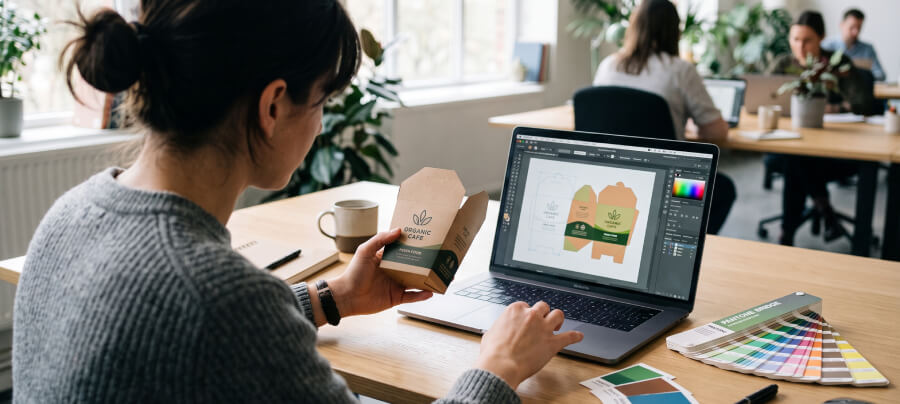
A brand or restaurant chain decides to put its logo on kraft containers, hands a design file to their designer or agency, and assumes sending it to the factory is enough to kick off sampling.
Then the factory sends it back, the bleed’s too tight, the color mode’s wrong, or the resolution’s too low to print clean. That kind of back and forth usually adds a week or two, often more than the printing itself takes.
This guide focuses on custom printing: what a design file actually needs to look like, how sampling works in practice, and how to time the lead time, so buyers or brand teams who’ve already decided to go custom can get it right on the first submission.
Get the Design File Specs Right Before You Waste a Round of Sampling
Most design files get bounced back not because the design looks bad, but because the file doesn’t meet print specs.
Worth confirming these details before a designer or agency even starts building the file, not after it’s already finished.
Bleed and the Safe Zone for Cutting
Bleed means extending any graphic or color block past the actual cut line, usually by around 3 millimeters, so a slight misalignment during cutting doesn’t leave an unprinted white edge showing.
The flip side is the safe zone: important text or logos need to sit a set distance back from the cut line too (also around 3 millimeters or more), so cutting variance doesn’t clip the text.
Factories fine-tune both numbers based on their actual die, so it’s worth confirming with the factory directly before sending the file rather than applying a generic number found online.
Use CMYK, Not RGB, to Avoid Color Shift
Designers are used to working in RGB on screen, since a monitor’s color range runs wider and colors look more saturated.
But printing presses build color in CMYK by layering ink, and CMYK’s range is narrower than RGB, especially for neon shades, deep blues, and bright greens.
Sending an RGB file straight to print causes a visible color shift, printed colors usually come out duller than what showed on screen. Convert the file to CMYK before sending it, and look at the color again after converting rather than catching the shift only after it’s already printed.
Resolution and File Format Requirements
Raster images (a logo that’s a photo or a scan) should run at least 300 dpi.
A low-resolution image pulled from a webpage screenshot or downloaded off social media and scaled up prints with visibly blurry edges.
Text and line art should go in as vector files whenever possible (AI, EPS, or a PDF with fonts outlined), since vector graphics stay sharp no matter how much they’re scaled, which matters a lot for the small-scale branding text common on these containers. Fonts should also be outlined before sending the file, so the factory doesn’t need the exact same font installed and the type doesn’t shift or get swapped for a system font.
Different Printing Methods Need Different Design Files
Kraft containers are typically printed by screen printing or offset printing, and each method limits what a design file can do differently.
Worth confirming which method the factory is actually using before finalizing the file, so the design doesn’t need reworking later.
What Screen Printing Limits in a Design File
Screen printing pushes ink through a mesh screen one layer at a time, and it works best with clean color blocks and a limited palette, generally six colors or fewer.
Gradients or large areas of subtle color transition don’t reproduce well, forcing a gradient design through screen printing usually leaves a visible gap between the file and the printed result. If the branding is simple, color blocks plus text, screen printing is usually the lower-cost option.
If the design has complex gradients or photo-quality imagery, worth checking with the factory beforehand whether screen printing can actually reproduce it, or considering offset printing instead.
What Offset Printing Allows in a Design File
Offset printing transfers ink from a photosensitive plate, and it holds color depth and detail better than screen printing, which works well for gradients, photos, or color-rich designs.
It usually comes with a minimum order threshold though, and unit cost runs high if the order is too small. If the branding needs finer detail (an illustration-style package design, for example), offset printing is usually the better fit, just confirm the order quantity can hit the factory’s minimum before finalizing the design, so the plan doesn’t fall apart after the design work is already done.
Extra Requirements for Foil Stamping and Spot Gloss
If a design file includes foil stamping or spot UV gloss, those areas usually need their own dedicated layer in the file, clearly marked, rather than leaving the factory to guess based on color alone.
The finishing placement also needs to line up with the base print, foil stamping in particular requires a second pass, so any misalignment shows up more on a small container. Worth double-checking foil placement against the original design carefully at the sampling stage.
The Sampling Process: What to Prepare Before Submitting
Once the design file goes out, sampling comes next. Sampling is the step that confirms how the design actually looks on the real container, and it’s worth taking the time to check it carefully rather than rushing straight to full production.
What to Prepare for a First Sample
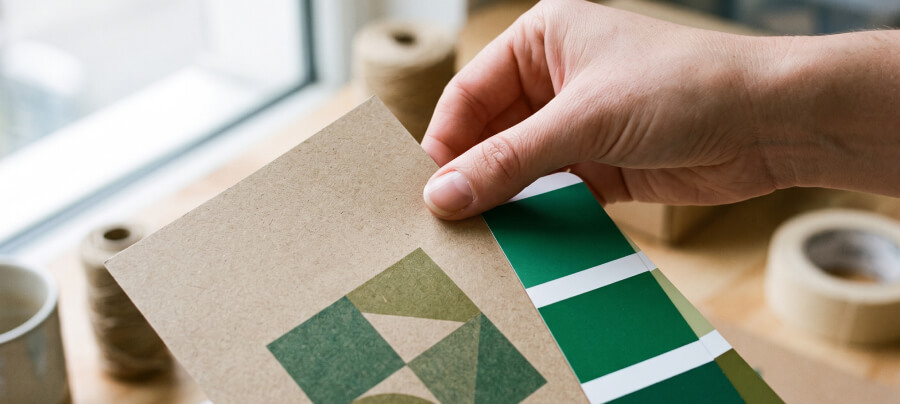
Beyond the design file itself, a factory usually needs the container’s spec info too (dimensions, paper weight, whether a grease-resistant coating is needed), color references (an internationally recognized color code is worth attaching, rather than describing colors from a screen), plus the intended printing method and order quantity.
Having all of this ready in one go saves the factory a round of follow-up questions and gets the sample closer to what full production will actually look like.
How Sampling Fees Work, and Whether They’re Refundable
Sampling fees vary by printing method and plate cost, screen printing usually runs lower, offset printing costs more since it requires a plate.
Based on market rates for kraft containers, plate fees typically run around $50 to $100, and that fee is usually waived on repeat orders for the same design. If a sample needs revisions and a re-run, most suppliers charge a one-time revision fee on top, typically around $50 to $65 depending on how much changes.
Most suppliers credit the sampling fee against the order once full production is confirmed, worth confirming this with the supplier before sampling starts and keeping it in writing, so there’s no mismatch in expectations later.
The Most Common Revisions After Sampling
The three spots that most often need adjusting after a sample comes back: color shift (what showed on screen versus the actual print), text or logo position drifting from the original file, and foil stamping or spot gloss placement not lining up.
When a sample arrives, worth comparing it directly against the original design file item by item rather than eyeballing it as close enough, small shifts show up more than expected on a small container.
Lead Times: The Full Timeline From Sampling to Production
Lead time on custom printing is easy to underestimate the first time around, especially when sampling time and production time get planned separately and the math comes out short.
Typical Lead Time Range
From design file confirmation to receiving a sample usually takes one to ten days.
Once the sample is approved, production plus shipping typically runs three to six weeks depending on order quantity and printing method, and it stretches further with larger orders or extra finishing steps (foil stamping, for example, which needs a second pass).
All told, six to eight weeks from sending the design file to receiving finished product is a safer estimate, and that doesn’t include time for revisions along the way. For a first order with a new supplier, see First-Time Kraft Container Buying Guide: MOQ Negotiation, Spec Confirmation, and Sampling, which covers the communication details worth watching on a first sampling round in more depth.
What Stretches the Timeline
A design file that doesn’t meet spec and needs revisions is the most common source of delay, which is exactly why getting bleed, color mode, and resolution right from the start matters.
Order volume near or above a factory’s capacity is another factor, since production may need to wait for existing orders to clear before it gets scheduled in.
Peak season (the run-up to holiday takeout demand, for example) usually stretches lead times further, so it’s worth planning order timing ahead rather than adding a custom print request right before peak season hits.
Is Rush Printing an Option
Some suppliers offer rush service, but it usually comes with an added cost, and not every printing method can be rushed the same way, screen printing plates are simpler to set up, so it has more flexibility for rush turnaround than offset.
If there’s a firm event date or launch deadline, worth telling the supplier upfront so they can factor it into scheduling, rather than asking for a rush after the order’s already confirmed.
Receiving Inspection: How to Avoid Writing Off a Whole Batch
When production arrives, an inspection that only spot-checks a few pieces for a quick look can miss a batch-wide color shift or placement issue, and by the time it’s caught at scale, it’s too late to fix.
How to Check for Color Shift
Worth comparing the confirmed sample from the sampling stage side by side against the production batch, rather than relying on memory.
If a visual comparison isn’t conclusive, a supplier can be asked to provide a color-difference test report, a measured comparison beats a subjective call, especially when brand identity depends on consistent color.
Full Inspection on the First Cartons, Spot Checks After
On a large shipment, worth doing a full inspection on the first few cartons that ship, and once print quality checks out consistent, switching to spot checks for later batches rather than spot-checking a handful of pieces the whole way through.
If print position or color drifts between batches, this staged approach catches it earlier, instead of finding out halfway through using the batch.
Most problems with custom printing on kraft containers don’t come down to what the printing technology can do, they come down to a design file that was never aligned with the factory’s printing method and capabilities from the start.
Getting bleed, color mode, and resolution confirmed before sending the file, checking every detail carefully at the sampling stage, and building in a conservative lead time estimate heads off most rework and delays before they happen.
For buyers evaluating more than just kraft, we’ll be covering custom printing on plant fiber containers, including print fidelity and finishing limits, along with private-label mold development for plastic containers, in upcoming guides.