



Whether you’re working with a new supplier for the first time or trying to standardize your company’s procurement process, the part that usually trips people up isn’t knowing what needs to happen, it’s knowing which step comes first and which ones can’t be skipped. That often means realizing certification documents were never requested halfway through spec negotiations, or finding out payment terms were never settled after samples are already approved.
This guide covers the complete food container (packaging materials) B2B procurement process from RFQ to delivery. It applies across materials, kraft paper, plant fiber, and plastic containers alike, and helps buyers build a standard operating procedure they can reuse every time.
Before You Request Quotes: Defining Requirements and a Spec Sheet
Before requesting quotes, nail down your requirements and put them into a spec sheet. How complete this step is directly determines how efficient and accurate the quote comparison stage turns out to be.
1. Define Your Actual Requirements and Use Case
Start with a few basic questions: what food will the container hold, what heat and cold range does it need, what’s your estimated monthly volume, do you need custom printing. These questions sound basic, but a lot of procurement cases get stuck because nobody asked them clearly up front, and the mismatch only shows up once quotes come back, forcing the whole process to restart.
Boxed hot meals and salad bar containers, for example, have completely different requirements. One needs to handle microwave reheating, the other needs clarity and a good seal. If you don’t separate these use cases clearly from the start, you end up sending the same spec to every supplier and getting back products where none of them actually fit.
2. Build a Spec Sheet: What It Needs to Cover
A spec sheet should cover at minimum size, capacity, material, heat range, printing needs, and estimated annual volume. Having one gives every supplier the same baseline to quote against, which is the only way a comparison actually means something. Requesting quotes verbally without a spec sheet lets different suppliers interpret your requirements differently and quote different products, so what you end up comparing isn’t really the same thing.
A spec sheet doesn’t need to be formal. A simple table with each spec written as a concrete number (say, “heat resistant to 120°C” instead of just “heat resistant”) is enough for suppliers to quote accurately, and it heads off disputes that come from misaligned assumptions later.
RFQ and Supplier Screening
The RFQ stage does two things at once: pin down quote details, and do a first pass on supplier credibility. It’s worth doing both together rather than waiting until later to find out a supplier itself is the problem.
Beyond unit price, ask about lead time, MOQ (minimum order quantity), payment terms, and whether the sample fee is refundable, all at the RFQ stage. A lot of procurement cases get stuck later over lead time or payment terms that were never discussed upfront, when they could have been raised during the RFQ instead of surfacing right before signing.
Comparing quotes isn’t just about unit price. Under the same unit price, payment terms (deposit percentage), MOQ, and lead time can all differ, and the real total cost ends up different too. Lay a few suppliers’ quotes out side by side on one table rather than just noting down unit prices, since a slightly higher unit price with a lower MOQ and shorter lead time can end up cheaper overall than the lowest quote on the sheet.
Response speed is also worth watching at this stage. Ask a slightly detailed spec question on purpose and see how long it takes to get a response, and whether the answer actually addresses your question. That communication quality is usually a preview of communication quality once something goes wrong later.
Supplier screening should also cover the supplier’s own credibility, certification documents, quality control process, financial stability, factors that have nothing to do with material but directly affect the risk of working with them. For a closer look at these questions, see How Should You Evaluate Food Container Suppliers? 8 Cross-Material Questions to Ask. These questions are worth asking at the RFQ stage rather than waiting until after you’ve already committed to a supplier, since a credibility problem is far cheaper to walk away from before a deposit changes hands than after.
Sample and Certification Review
Before moving into sample production, confirm the supplier can actually produce a sample that matches your spec sheet. Sample quality is one of the clearest signals of whether this supplier is worth continuing with.
3. Sample Approval Process
When the sample arrives, check it item by item against the spec sheet, size, material, print quality, heat and cold performance, don’t approve it just because it looks fine. If there’s a gap, give the supplier specific feedback and see whether they can fix it within a reasonable time. That back-and-forth also tells you a lot about the supplier’s communication speed and problem-solving ability.
Keep at least one approved sample as a reference for comparing against production batches later. Having it on hand to compare directly is far more accurate than relying on memory or the wording on a spec sheet, and it lets you catch a gap between the sample and the production run immediately.
4. Certification Document Review
Alongside sample approval, request a food-contact material safety declaration and confirm certification from FDA or the relevant local food safety authority. If you have export needs, confirm PFAS-related material declarations too. Once you have the documents, check the dates, the issuing body, and whether they actually match the product you’re ordering, don’t just file them away once they arrive.
Some suppliers will provide third-party inspection or test reports directly, and those documents are usually worth more than a supplier’s own self-issued declaration. This step isn’t just a food safety check, it’s also your most direct proof of compliance if a customer audits you down the line. Spending the time to review this properly upfront is a lot less work than scrambling to fill gaps after the fact.
From Contract to Production
Once samples and certifications are both confirmed, move into formal contract signing and scheduling production. The priority at this stage is getting verbally agreed terms down in writing, to avoid gaps in understanding later.
5. Contract Terms and Payment Conditions
Before signing, confirm liability for delivery delays, payment terms (deposit percentage, when the balance is due), and how spec changes get handled, line by line. Don’t sign based on price alone. Some suppliers write contract clauses that shift full responsibility for delays onto force majeure, and that’s worth raising before you sign, not after a delay actually happens and you find the contract doesn’t favor you.
A supplier asking for a high deposit percentage, or requiring full payment before shipment, is usually signaling that bargaining power and risk sit mostly on your side of the table. That’s a useful data point when comparing candidate suppliers, and you don’t have to accept the first terms offered.
None of these terms are set in stone just because a supplier proposes them first. Treat the first draft of any contract as a starting point for negotiation rather than a final answer, especially on the clauses around delay liability and payment timing.
6. Production Oversight and Lead Time Tracking
Once production starts, check in with the supplier regularly on progress, especially for large orders or orders placed around peak season, when lead times are more likely to slip. For cross-border procurement, there’s also customs clearance, container loading, and shipping schedules between production completion and shipment, factor that time in too, not just production days.
The same supplier may be juggling several large orders at once and quietly push your order back in the queue without telling you. It’s worth asking about realistic peak-season lead times before you order, and tracking production proactively rather than waiting for the supplier to update you.
Shipping and Receiving
The period right before shipping and right after delivery is where the procurement process is most likely to rack up unexpected costs from something getting overlooked.
7. Pre-Shipment Document Check
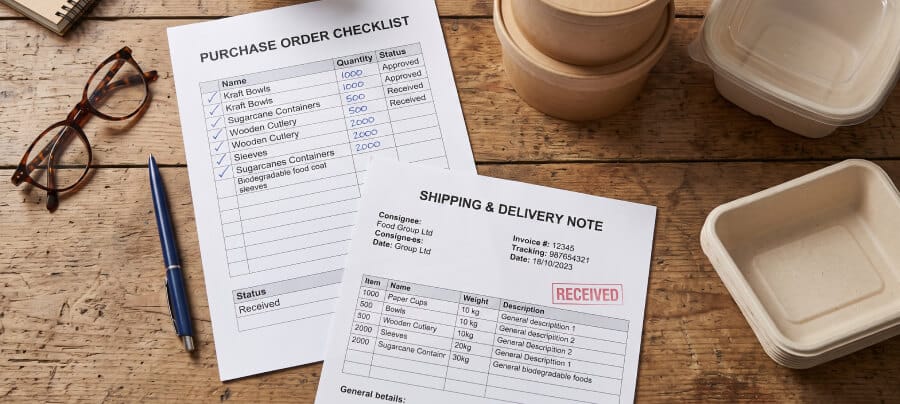
Before shipping, confirm with the supplier that shipping documents are complete. For import purchases, how complete the ocean export documents are (bill of lading, certificate of origin, customs paperwork) directly affects how fast the shipment clears customs, and a single missing document can hold a container at the port for days while it gets sorted out.
8. Receiving Inspection and Recordkeeping
Don’t just move stock straight into storage once it arrives. Spot-check by batch, confirm quantity, spec, and print quality match the sample, and if something’s off, flag it with the supplier immediately, that’s a lot easier to resolve than discovering it after the product has already shipped to your own customers. Settle the standards for handling defective product, returns, compensation, and turnaround time for a resolution during the contract stage, not after delivery when both sides may have assumed something different.
Keep a record of every receiving inspection, including photos of any defects and the supplier’s response time on each issue. It makes it easier to track a supplier’s performance over time and gives you something concrete to reference the next time you’re deciding whether to renew, rather than relying on a general impression that may not reflect what actually happened.
How to Use This SOP
You don’t need to run through all eight steps by the book on every single order. For a new supplier you’re working with for the first time, it’s worth going through the full process, especially the sample and certification review, don’t skip those. For a supplier you’ve already worked with and whose quality has been consistent, later orders can run a simplified version, focused mainly on lead time tracking and receiving inspection.
Track how long each step actually takes. After a few procurement cycles, you’ll have a much more accurate sense of your own company’s procurement timeline than you would from just applying a generic process, and it becomes easier to see which step is your company’s typical bottleneck, whether that’s slow internal sign-off on spec sheets or suppliers who consistently underestimate lead time.
Turning this SOP into your company’s internal standard process also lowers the communication cost when someone new takes over procurement, they can follow the process instead of relearning your supply chain’s quirks from scratch each time.
Every material has its own technical details at the spec level. This piece covers the process skeleton that applies across materials, when you run into a material-specific technical question, you’ll still need the matching spec knowledge to work through it. A process can save you from unnecessary detours, but it can’t replace understanding the product itself, and no SOP is a substitute for actually knowing what you’re buying.